About me
| Thursday | +21° | +17° | |
| Friday | +22° | +12° | |
| Saturday | +28° | +14° | |
| Sunday | +19° | +10° | |
| Monday | +18° | +15° | |
| Tuesday | +18° | +15° |
My Licenses
I used mask png mask 242 from
Mizteeque.
I used a drop shadow of vertical 0, horizonal 5, opacity 75, blur 10.
Open a new transparent canvas 750 by 750 pixels and fill with white.
Paste the mask and resize it 75%, select all, float and defloat, make a new layer, paste paper 6 into the selection, deselect and delete the black layer. Position this mask top right, duplicate it, resize the copy 95% and move down and to the left.
Paste element 3, resize 75%, position and apply the shadow.
Paste element 39, resize 75%, duplicate, position and apply the shadow to each.
Paste element 38, resize 75%, position and apply the shadow.
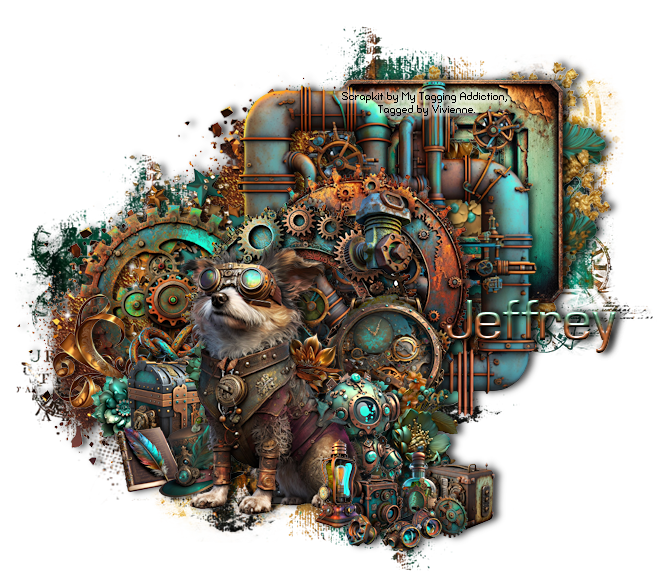
You should now have something like this.
Paste frame 5, resize 50%, position and apply the shadow.
Paste element 27, resize 75%, position and apply the shadow.
Paste element 9, resize 45%, position and apply the shadow.
Paste frame 2, resize 55%, position and apply the shadow.
Paste frame 1, resize 50%, position and apply the shadow.
Paste element 5, resize 20%, position and apply the shadow.
Paste element 22, resize 30%, position and apply the shadow.
Paste element 4, resize 30%, position and apply the shadow.
Paste element 31, resize 15%, position and apply the shadow.
Paste element 12, resize 30%, position and apply the shadow.
Paste element 40, resize 25%, position and apply the shadow.
Paste element 6, resize 25%, position and apply the shadow.
Paste element 30, resize 15%, position and apply the shadow.
Paste element 25, resize 30%, position and apply the shadow.
Paste element 32, resize 15%, position and apply the shadow.
Paste element 21, resize 18%, position and apply the shadow.
Paste element 15, resize 22%, position and apply the shadow.
Paste element 28, resize 60%, position and apply the shadow.
Paste element 23, resize 17%, position and apply the shadow.
Paste element 20, resize 17%, position and apply the shadow.
Paste element 10, resize 10%, mirror, position and apply the shadow.
Paste element 26, resize 15%, position and apply the shadow.
Paste element 16, resize 20%, position and apply the shadow.
Paste element 24, resize 13%, position and apply the shadow.
Paste element 13, resize 8%, mirror, position and apply the shadow.
Check your layers.
Duplicate the top copy of the mask, mirror and flip it, bring it down so just a little shows below the dog and erase the part on the right.
Add your copyright information and text and export on a transparent background as a png.
COPYRIGHT
Search Blog
Labels
- Animated
- beginners
- Bonus tube
- Bundle
- Christmas
- Creative Design Outlet
- Easter
- Exclusive tube
- Fall
- Freebie kit
- FTU kit
- FTU tube
- FTU with purchase
- Goldwasser
- Halloween
- Independence Day
- Jeff Haynie
- Jenn's Designs
- learning
- misticheskaya
- Miztueeqe
- My Tagging Addiction
- New Year
- No tube
- PTU kit
- PTU kit with tube
- PTU tube
- Snag tags
- Spring
- St. Patricks
- Summer
- Taggerworld
- Thanksgiving
- Valentine
- Winter


0 comments:
Post a Comment